
Again I managed to write too much for a single post so I had to split it into several parts:
- In Part 1 I talk about digiKam Image Editor and picture orientation and sizing commands.
- In Part 2 I present some color and histograms theory.
- In this part I go into details of color and brightness correction with "Levels Adjust" command.
- In Part 4 I describe how to achieve good pictures quality without using unreasonable amounts of time.
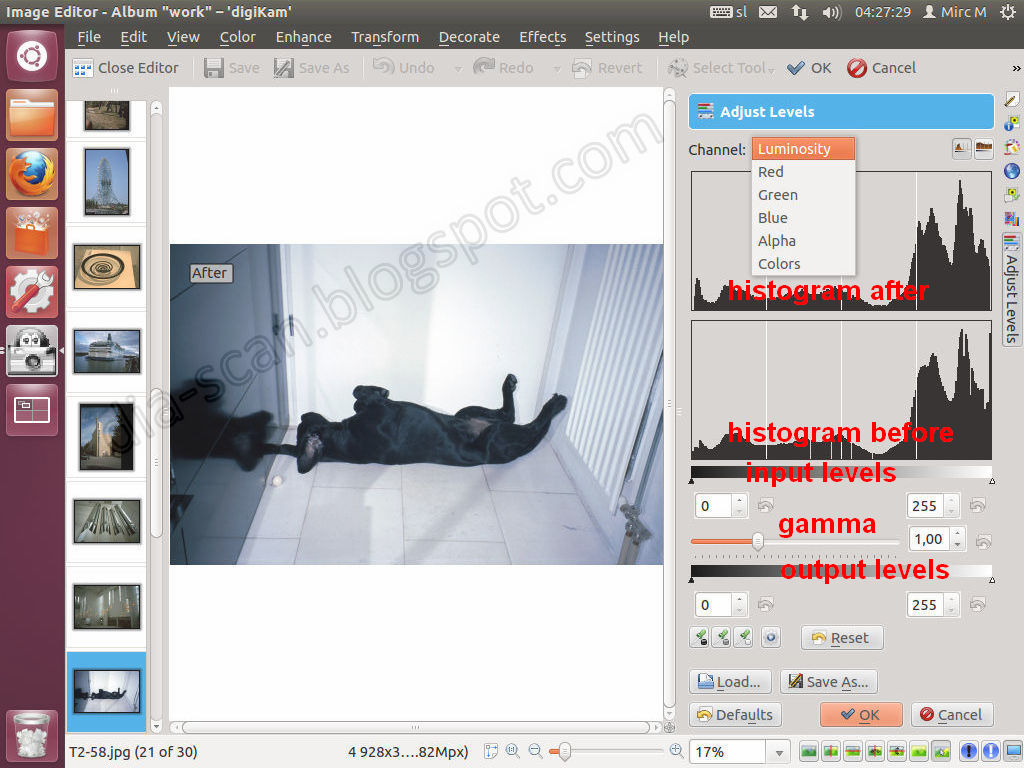
Using “Levels Adjust” command for color and brightness correction
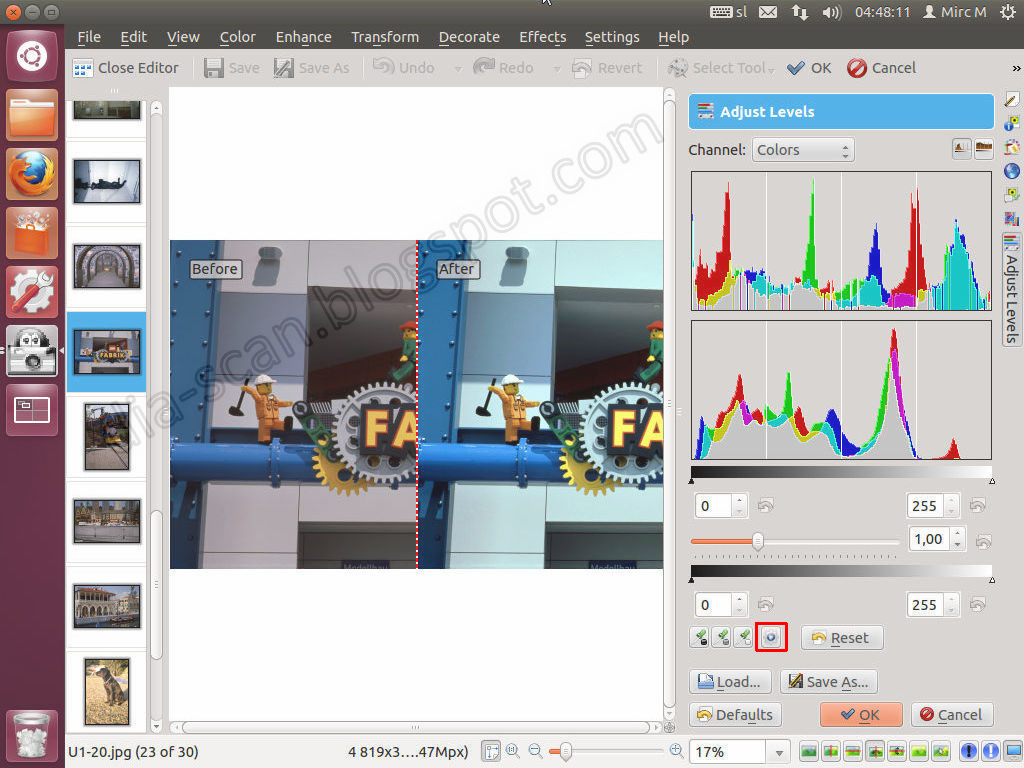
When the command is started it opens an Adjust Levels area at the right side of the picture with two histograms and several controls. The lower histogram represents the picture before and the upper histogram represents the picture after the changes. With the control Channel you choose between luminosity, one of the colors or all 3 colors together (you can ignore alpha) to be displayed in both histograms and at the same time to be corrected by other controls. With 2 buttons in the top right corner you can choose linear or logarithmic histograms; I strongly suggest the first one. The controls below histograms (sliders, value selectors and buttons) allow adjustments of input, output and gamma levels for entity selected by Channel control. It also includes a button to “Adjust all Levels Automatically”, 3 buttons to select black, gray or white area in the picture and adjust colors to that and also “reset to Default” button for each level control. The settings can be saved (with a name) to be reloaded later. And (this is my favorite) the last applied settings are saved automatically and loaded when command is used again for next picture.
There are several possibilities to preview the effect of current correction settings on the picture which can be chosen by buttons under the picture. The most useful I find the possibilities to divide the picture vertically or horizontally to before and after sections or the “Mouse-over mode” which means when the mouse pointer is in picture area in the middle you see picture before and when mouse pointer is in the Adjust Levels area on the right you see the picture after current settings applied.
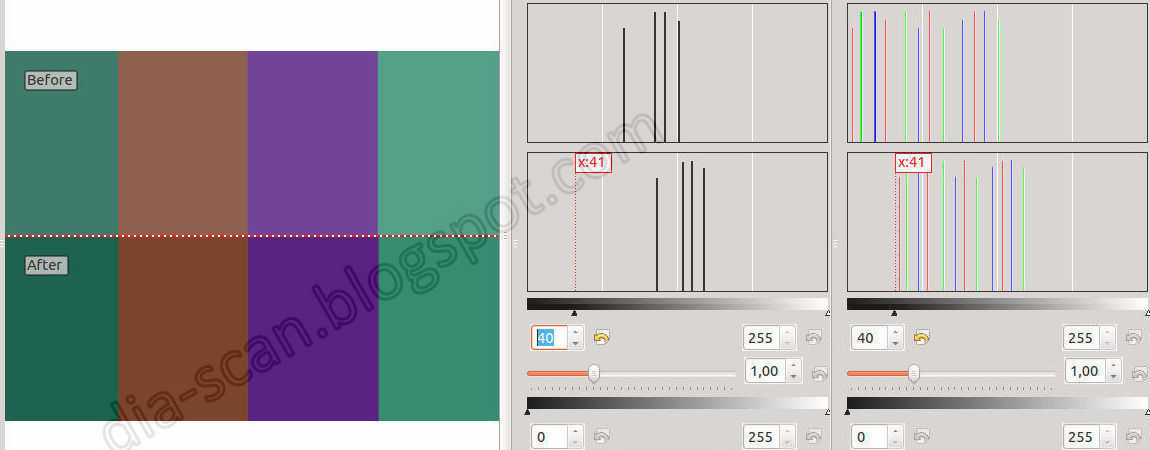
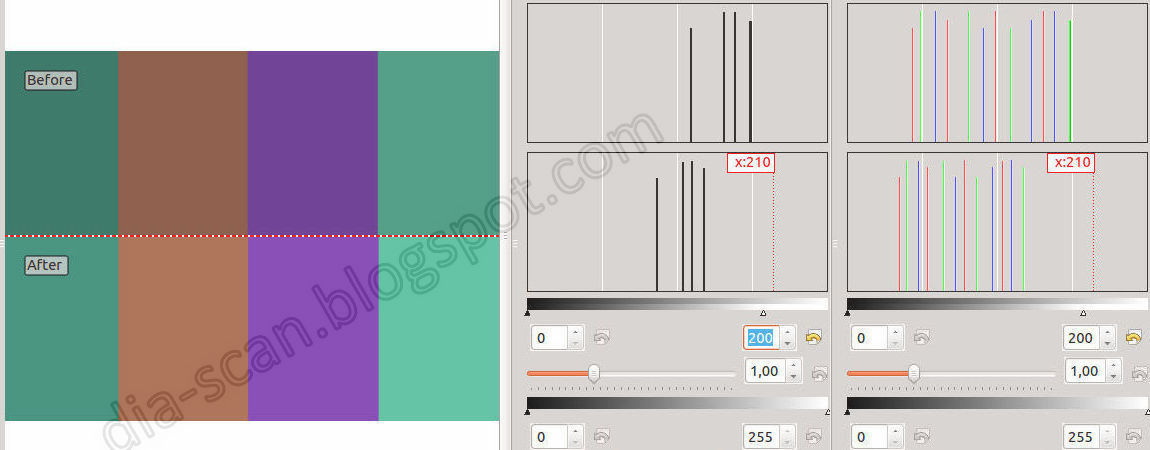
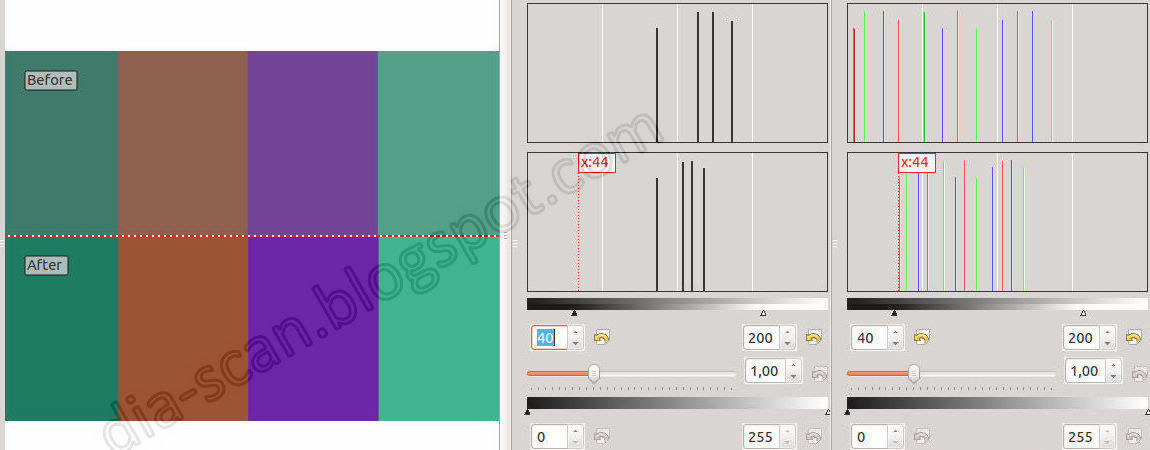
So what are input, output and gamma levels? Remember, that each of them acts on selected channel; that is on luminosity, red, green or blue. Let us explain them one at a time. I will use an artificial picture with only 4 colors and its histograms to better illustrate the effects of different settings and I have artificially merged luminosity and colors histograms, so you can see all at the same time (it is not what you see in digiKam).
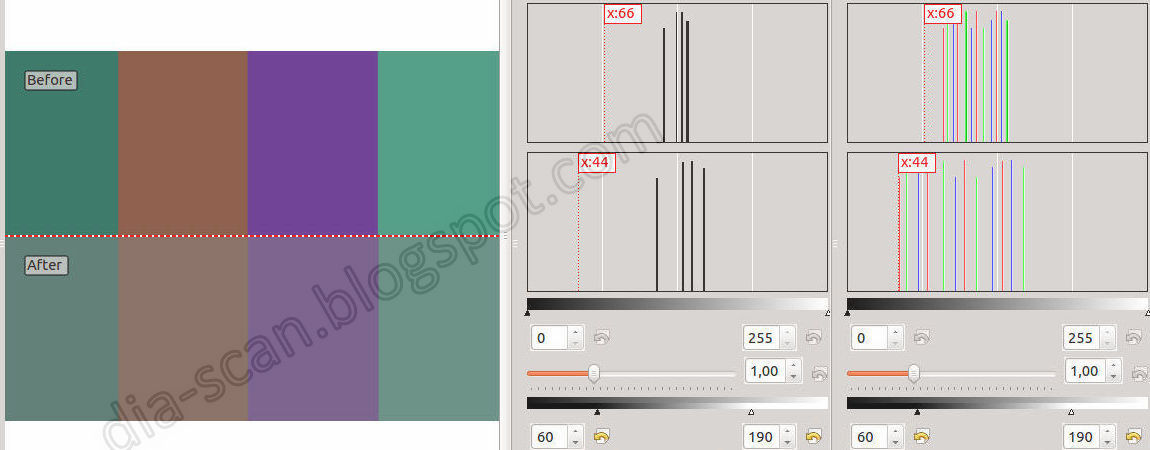
Input levels (it can be controlled by moving the two marks on the top slider or by directly choosing the two values) allow us to choose lower and higher limit of selected channel that will be used in resulting picture. In other words we can cut off some of the histogram on the left (dark) and some of it on the right (bright) side. The resulting effect is that the remaining middle part of the histogram is linearly expanded over the complete range of the histogram. If we cut off the left (first example below), the selected channel looks darker, if we cut off on the right (second example below), it looks brighter and if we cut off on both sides (third example below), it looks sharper. Most of the time we want to achieve a sharp image with vivid colors and this is how to do it.
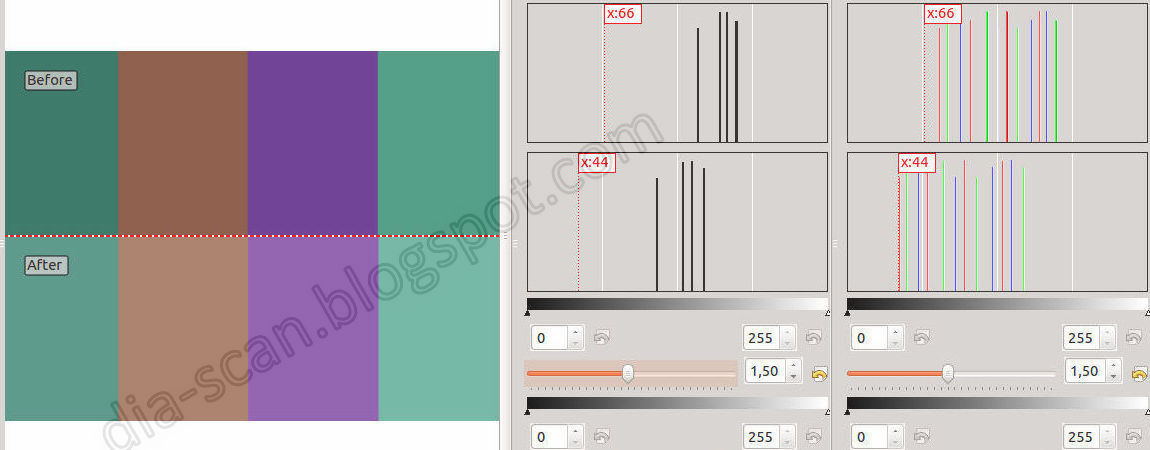
Using output levels (it can be controlled by moving the two marks on the bottom slider or by directly choosing the two values) is almost exactly the opposite of using input levels. It cuts off some of the available output spectrum; left, right or both. Input histogram is linearly compressed into output histogram, which becomes zero in the cut off borders. If we cut off the left, the selected channel looks brighter, if we cut off on the right, it looks darker and if we cut off on both sides (like in example below), it looks softer. Most of the time this is not exactly what we want, but sometimes this is a way to achieve soft artistic picture.
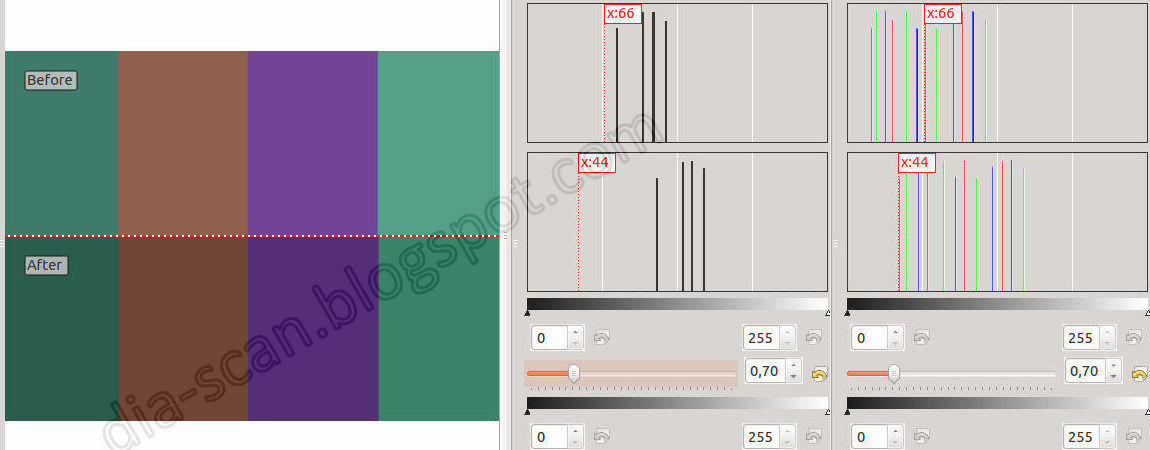
Gamma level (it can be controlled by moving the only mark on the middle slider or by directly choosing the value) acts strongly in the middle of selected channels histogram, but exactly contrary to input levels it has minimal effect in the left and right borders. Default value is 1 meaning picture remains unchanged. Values smaller than 1 push histogram to the left by compressing left side and expanding right side of the histogram making the picture darker. Values bigger than 1 push histogram to the right compressing right side and expanding left side of the histogram making the picture brighter. Mathematically it is a more complicated formula (not a linear operation used by input or output levels), but such details are not really important. An underexposed picture can be made brighter by correcting it with positive gamma value (first example below) and an overexposed picture can be made darker with negative gamma value (second example below). Even a picture, that is extremely under or overexposed can be corrected to quite viewable (although far from perfect) by using more radical gamma values over 1.6 or under 0.6.
The button Adjust all Levels Automatically is quite interesting. It automatically adjusts input levels for all channels (that is all 3 colors and luminosity) to use all available spectrum, in other words it finds and cuts off the left and right zero edge of the histogram for each channel. As I have already mentioned I usually find this too agressive, but it is a good way to start (example below is another another Legoland picture where I tried this command).
The buttons to select white, gray or black in the picture also adjust input levels, but with an important difference. You point to the area on the picture that you know should be white or black (but it is not because the slide faded before it was scanned) then each color input levels are calculated accordingly to get the desired result. I do not use them much, but sometimes they are worth a try.
No comments:
Post a Comment